Photographing Reptiles and Amphibians in Enclosures
I wanted to make this quick tutorial about how I photograph reptiles and amphibians in enclosures without off-camera flash. Since I use relatively strong full-spectrum LEDs on all of my enclosures, I only use the ambient enclosure light as my light source. Why not use off-camera flash? Well, I think specimens in enclosures look better under full-spectrum LED light than off-camera flash. Personal preference. You will certainly be able to stop down more to get more of your subject in focus when utilizing off-camera flash. I don’t use a photo stacking, also called focus stacking, technique, but it is a workaround to get more of the subject in focus. It is a technique in photography where multiple images with different focus points are combined to create a single image with a greater depth of field or enhanced sharpness. Having a fundamental understanding of camera settings helps, but this tutorial will walk you through it. As plants in enclosures grow in, they create natural looking shadows that are opened up when using off-camera flash. I like the shadows! I don’t like them on the subject, but I think photos with shadows created by hardscape and plants make images that are more appealing. Again, this is my opinion and personal preference.
Equipment and Software
Adobe Camera RAW (Lightroom has the same Develop Module)
Adobe Photoshop 2025
Photography/Camera Settings
f/5.6-f/8
Shutter at 1/125
ISO 800 to 6400
Lighting: ambient enclosure LED
Handheld - herps are always on the move!
Always shoot RAW opposed to JPEG to have a lossless file. You’re going to want all of the pixels!
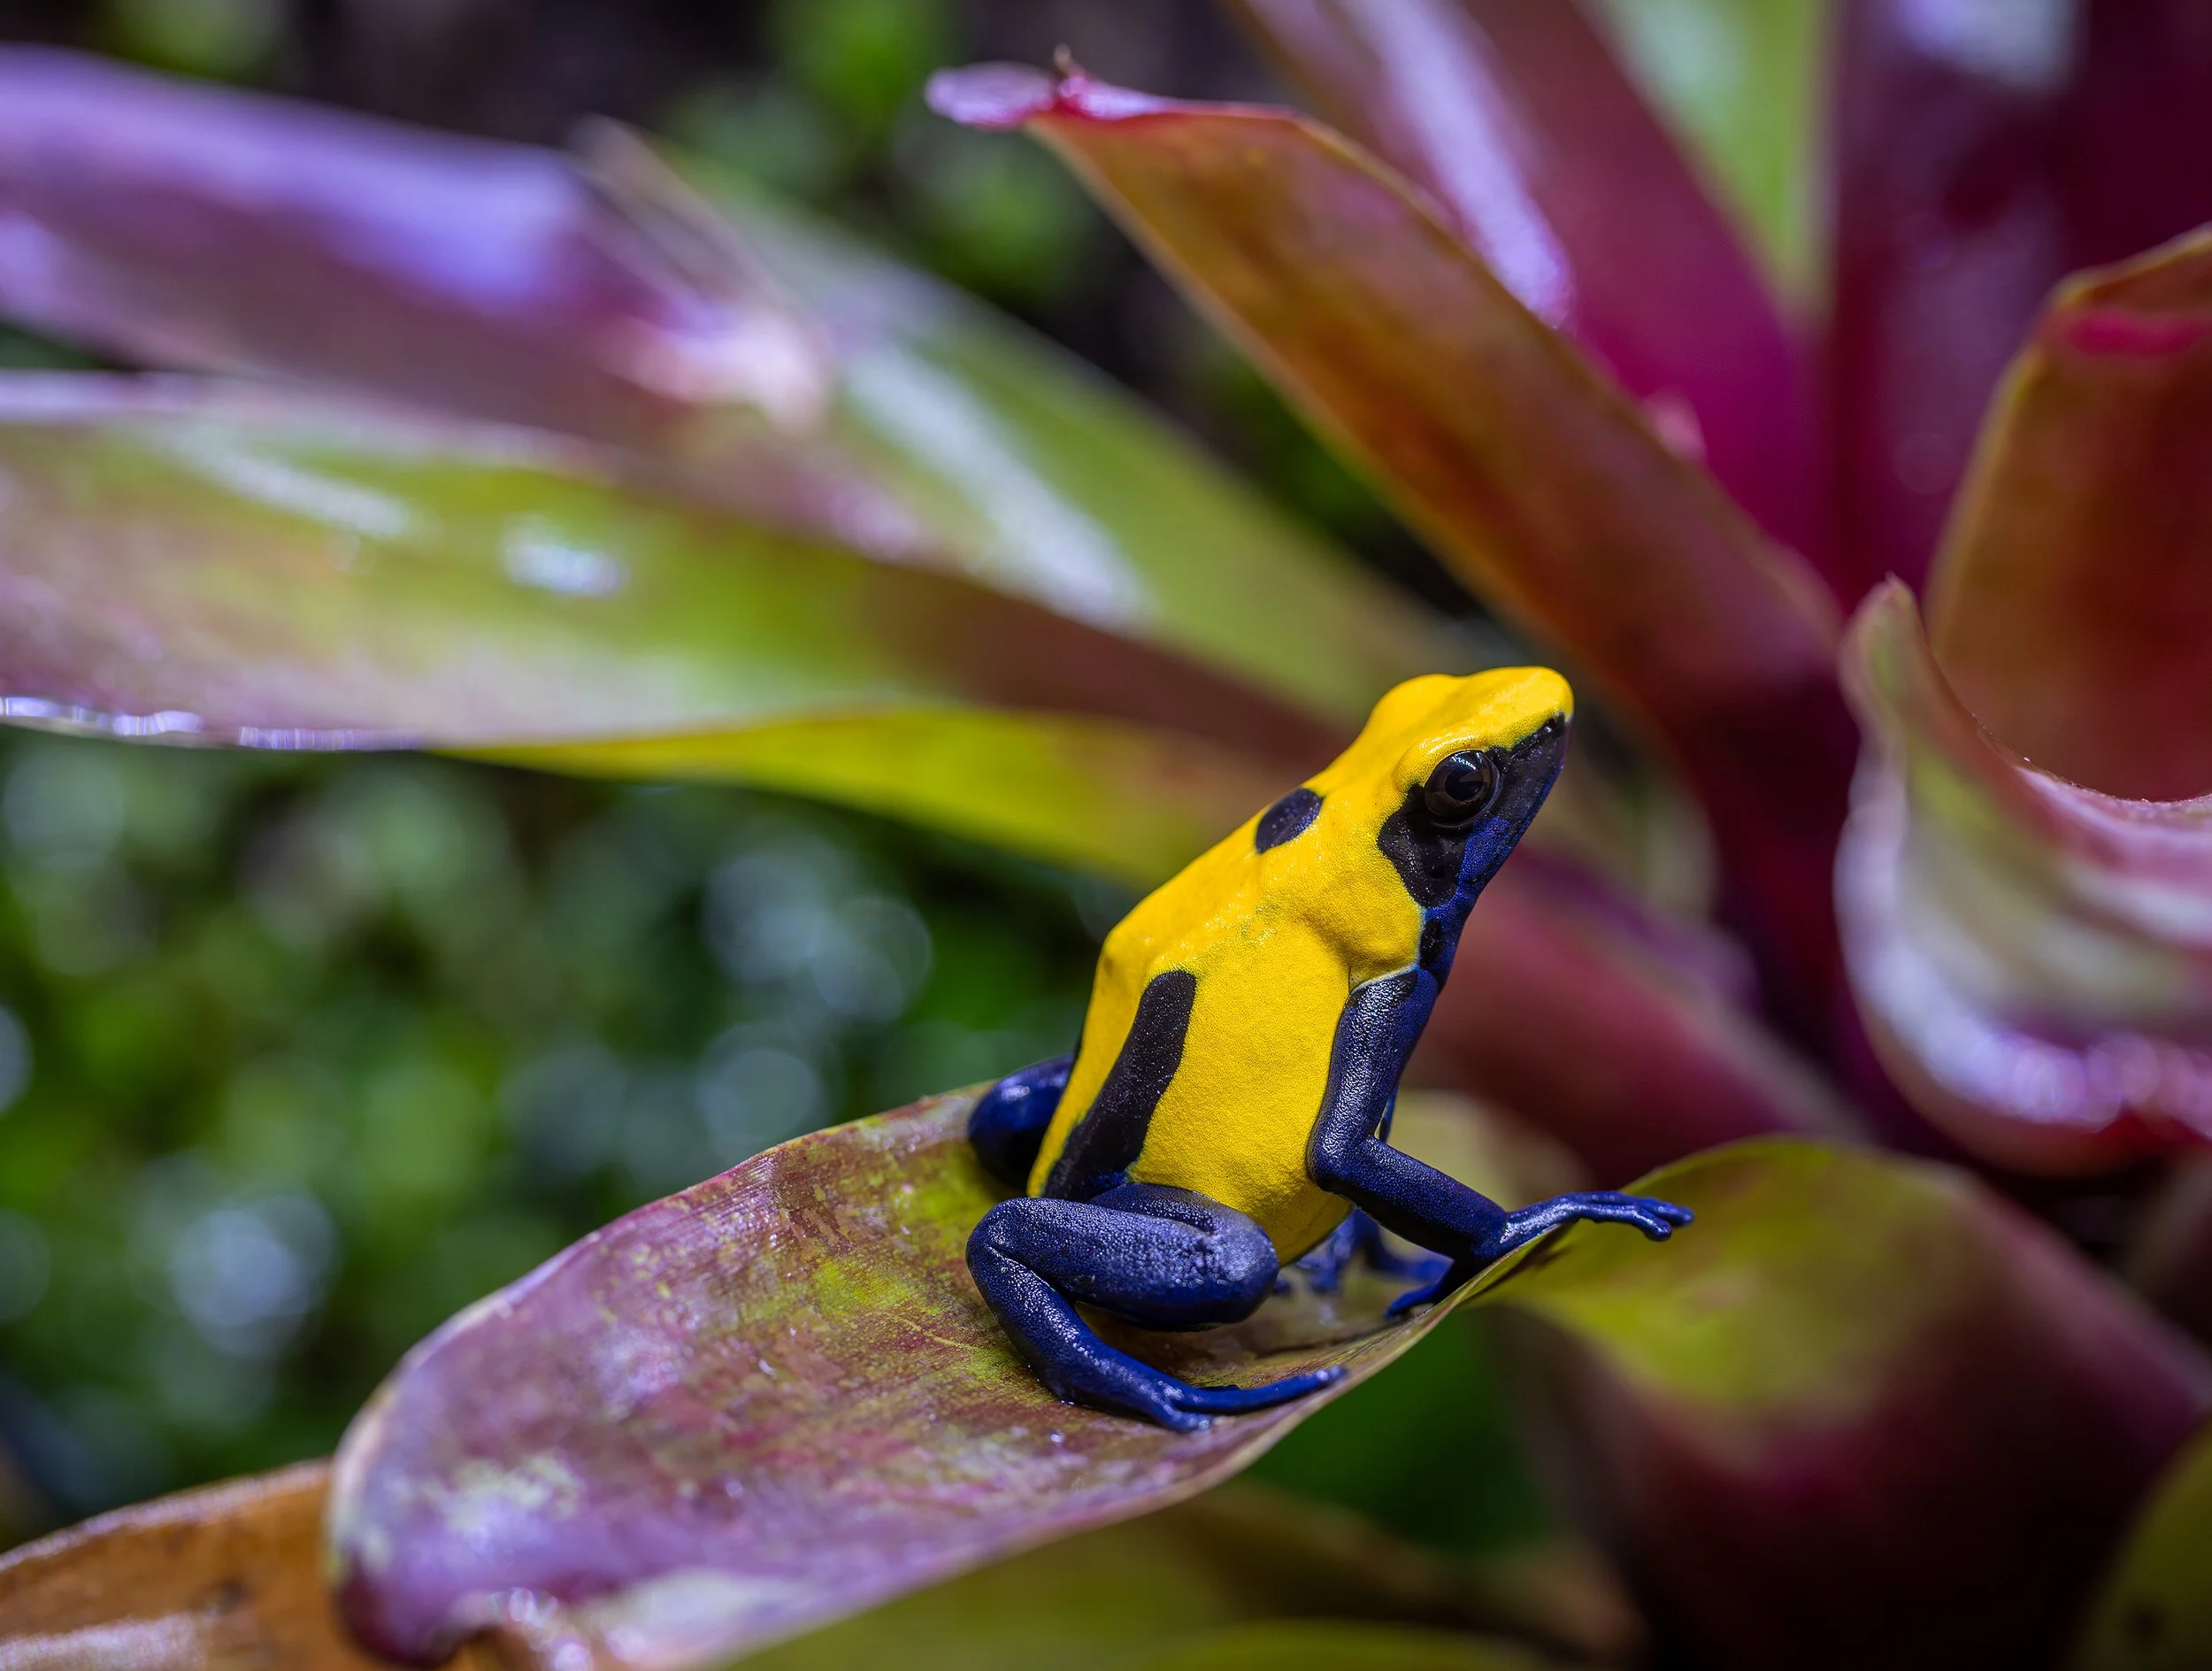
My subject for this tutorial is a beautiful Dendrobates tinctorius 'Citronella'. As mentioned, I do not use any off-camera flash when photographing herps in enclosures since they are illuminated by relatively powerful full-spectrum LEDs. Most of the LEDs I use for my vivaria are around 6000-6500K. You will most definitely get more detail and focus when using off-camera flash, so that should be a consideration when deciding if supplemental lighting is desired.

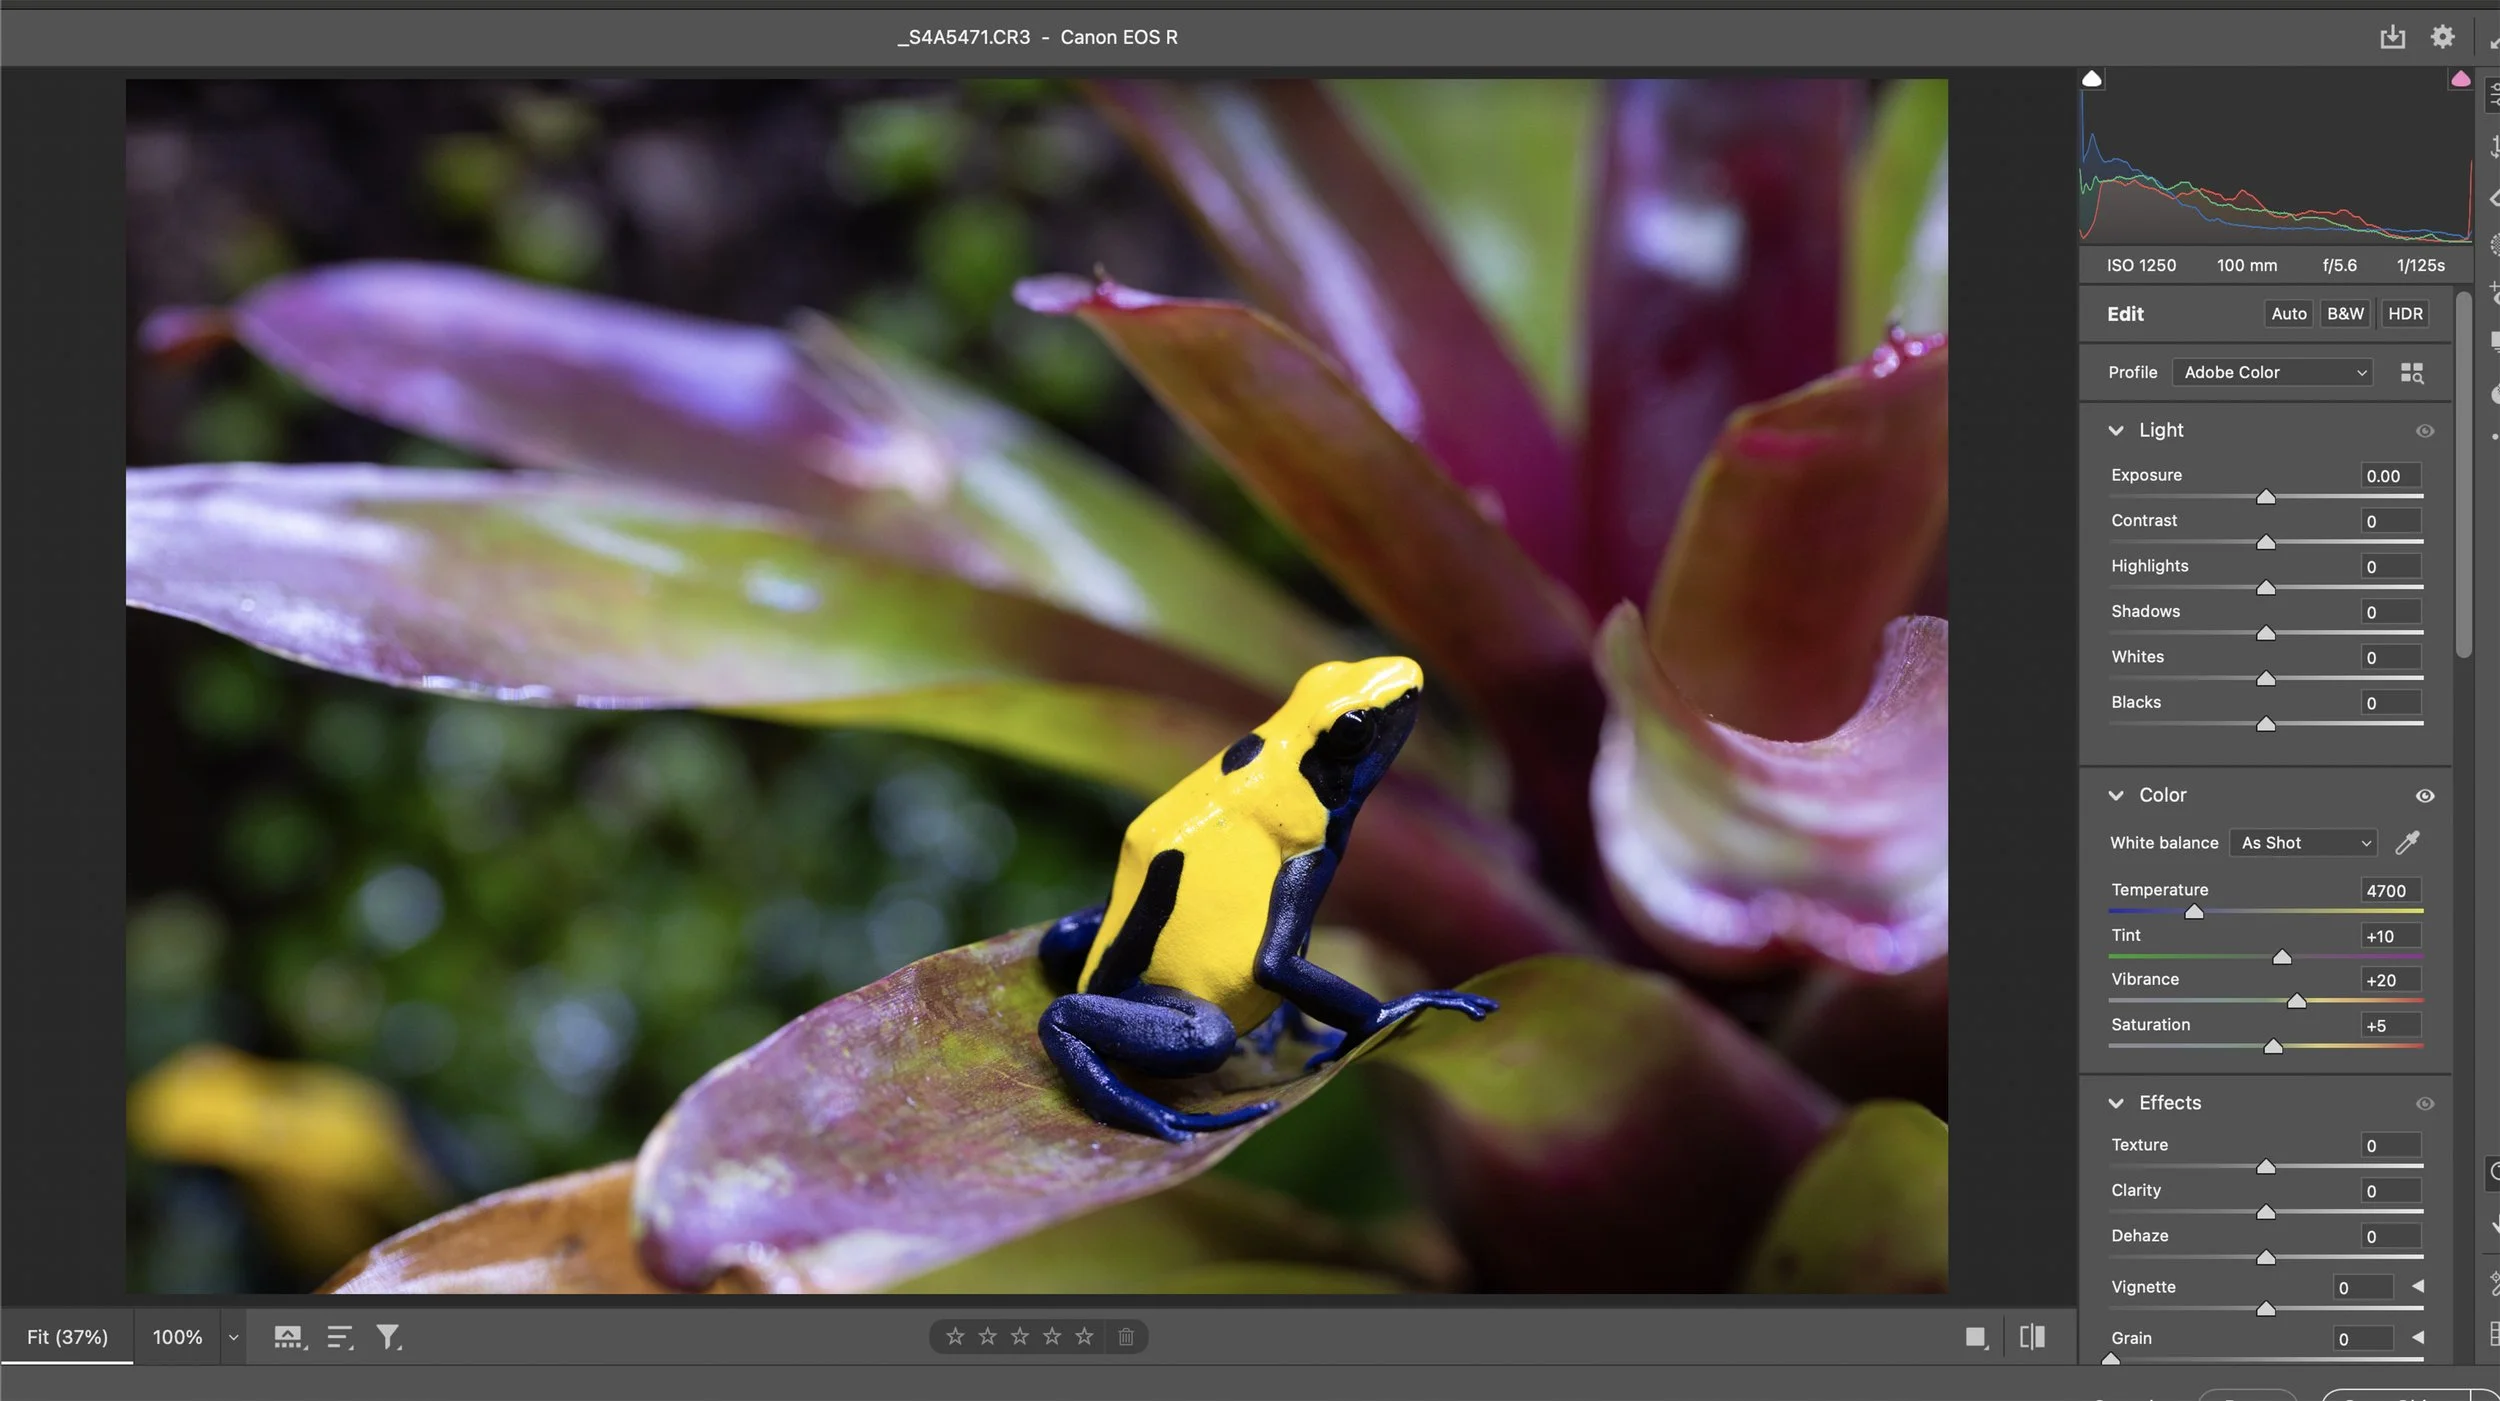
Open the image in Adobe Camera Raw (Lightroom has the same Develop Module). First, select the Profile dropdown and select the color profile you prefer as a one-click starting point for photo editing. I always use Adobe Color. I very rarely use any of the other color profiles. I’m a creature of habit and have been using Adobe Color for many years.
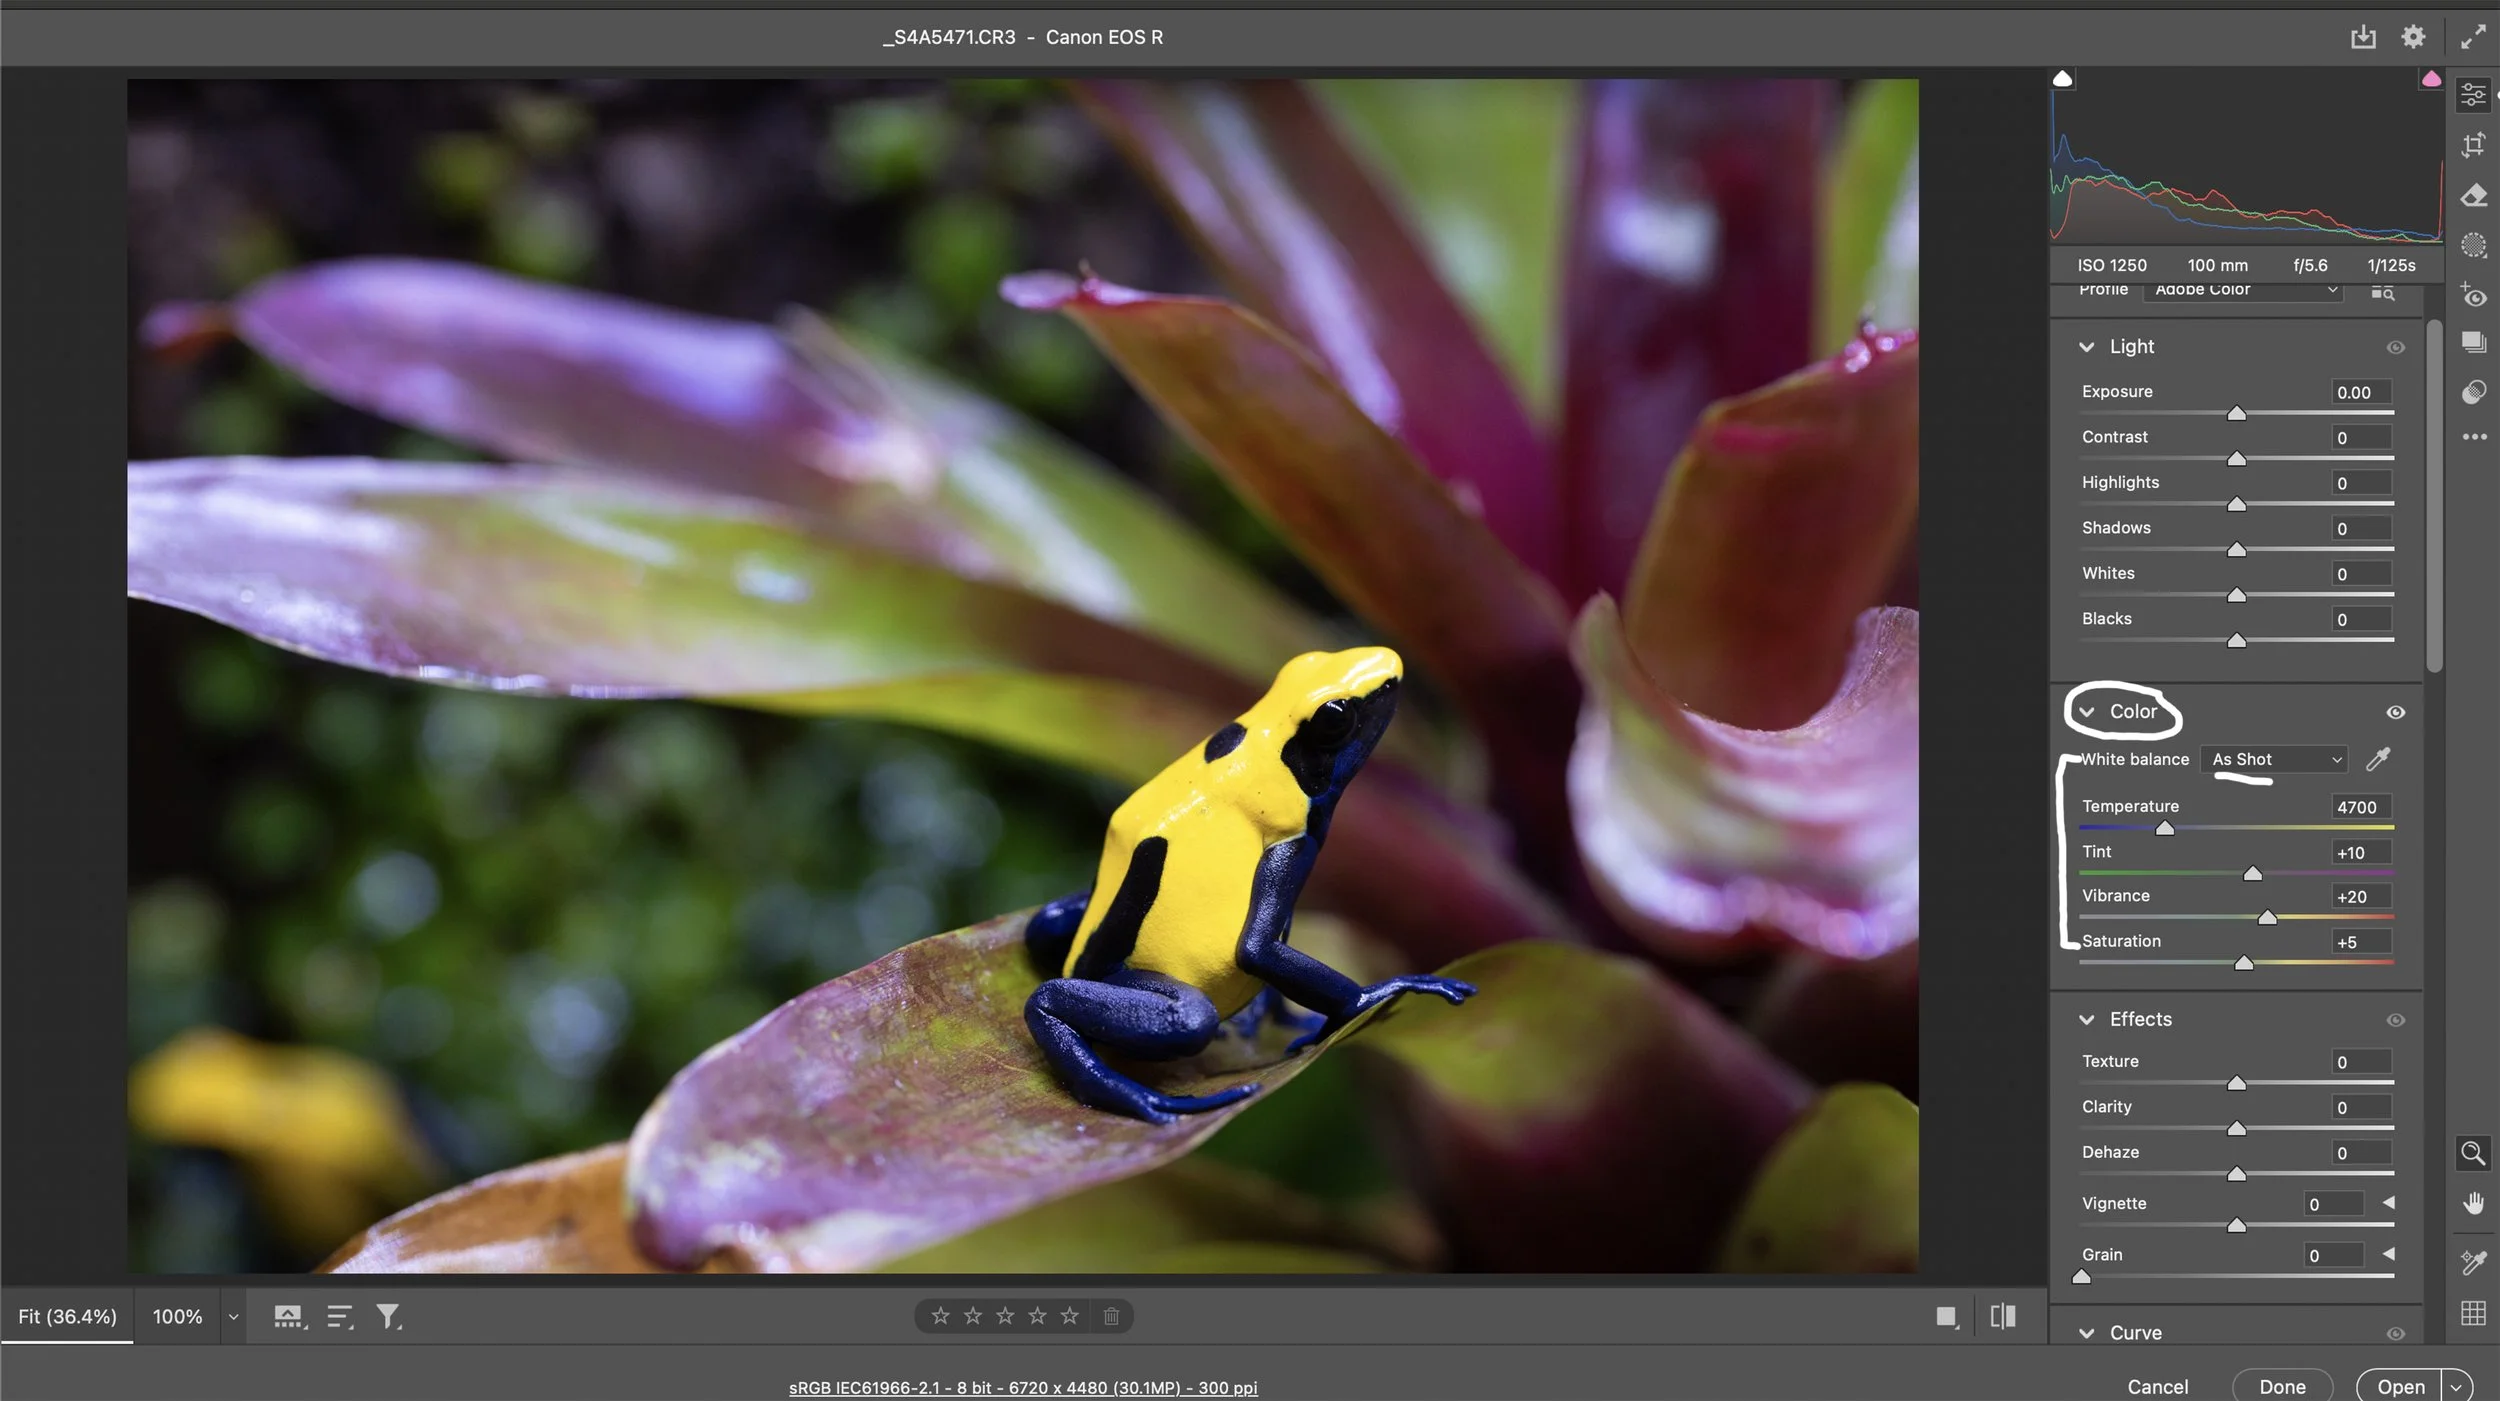
Next, let’s work on the Color sliders. When photographing herps in enclosures, I always shoot Auto While Balance in-camera, then correct the white balance in Adobe Camera Raw (ACR). Unlike my studio photography, I don’t use a gray card to nail white balance. This is certainly a creative decision. Adjust the white balance so the image is appealing to you. I actually think the Auto White Balance did a pretty good job in-camera, so I’m going to leave the temperature and tint as is. Usually I pick Auto from the White Balance dropdown menu and adjust from there. The next slider I adjust is Vibrance. You can usually push Vibrance to +20 or so, but you need to be more conservative with the Saturarion slider. I usually keep that slider around +5 to +10.
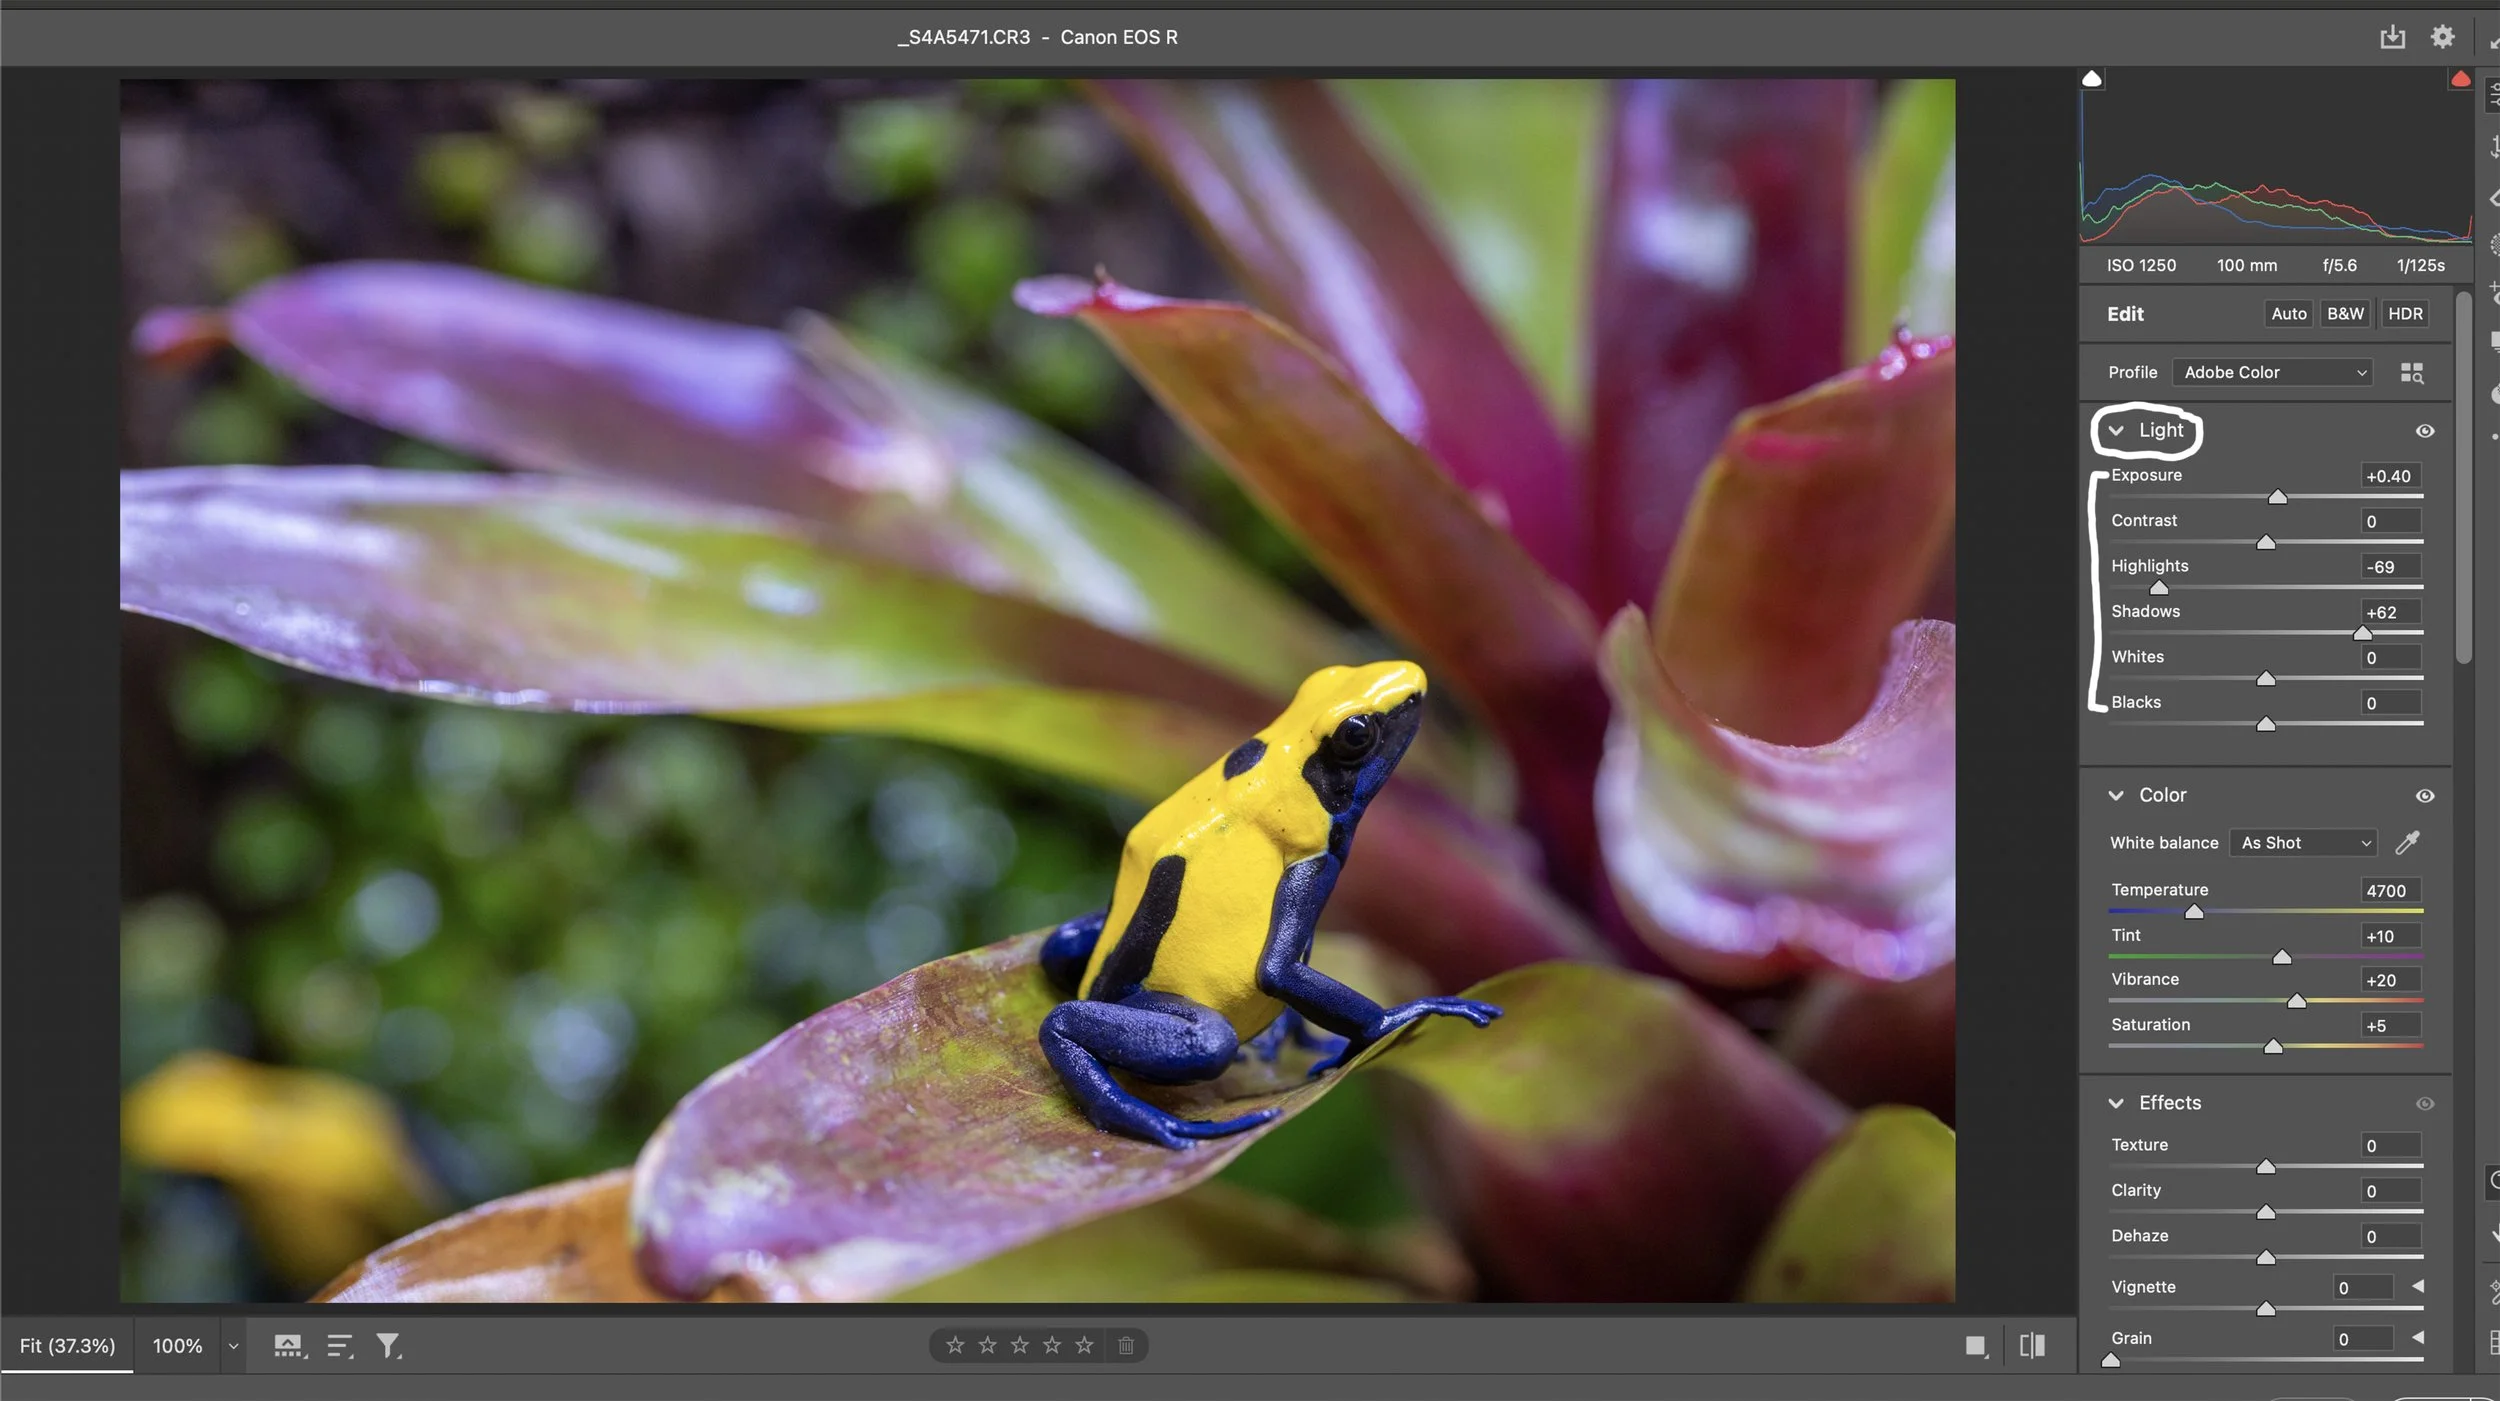
After the Color sliders, I work on the Light sliders in ACR, Exposure through Blacks. The entire image is underexposed by about 1/2 a stop, so I pushed the Exposure slider to +40. I never really touch the Contrast slider. As you can see, the highlights in the image need to be pulled back quite a bit, so I move the Highlights slider to the left to -69. This slider controls the brightness of the light parts of the photo. The Shadows slider controls the brightness of the darker parts of the photo. I like to open up some shadows, so I pushed this slider to +62. The White and Black sliders are self-explanatory and should be adjusted as needed.
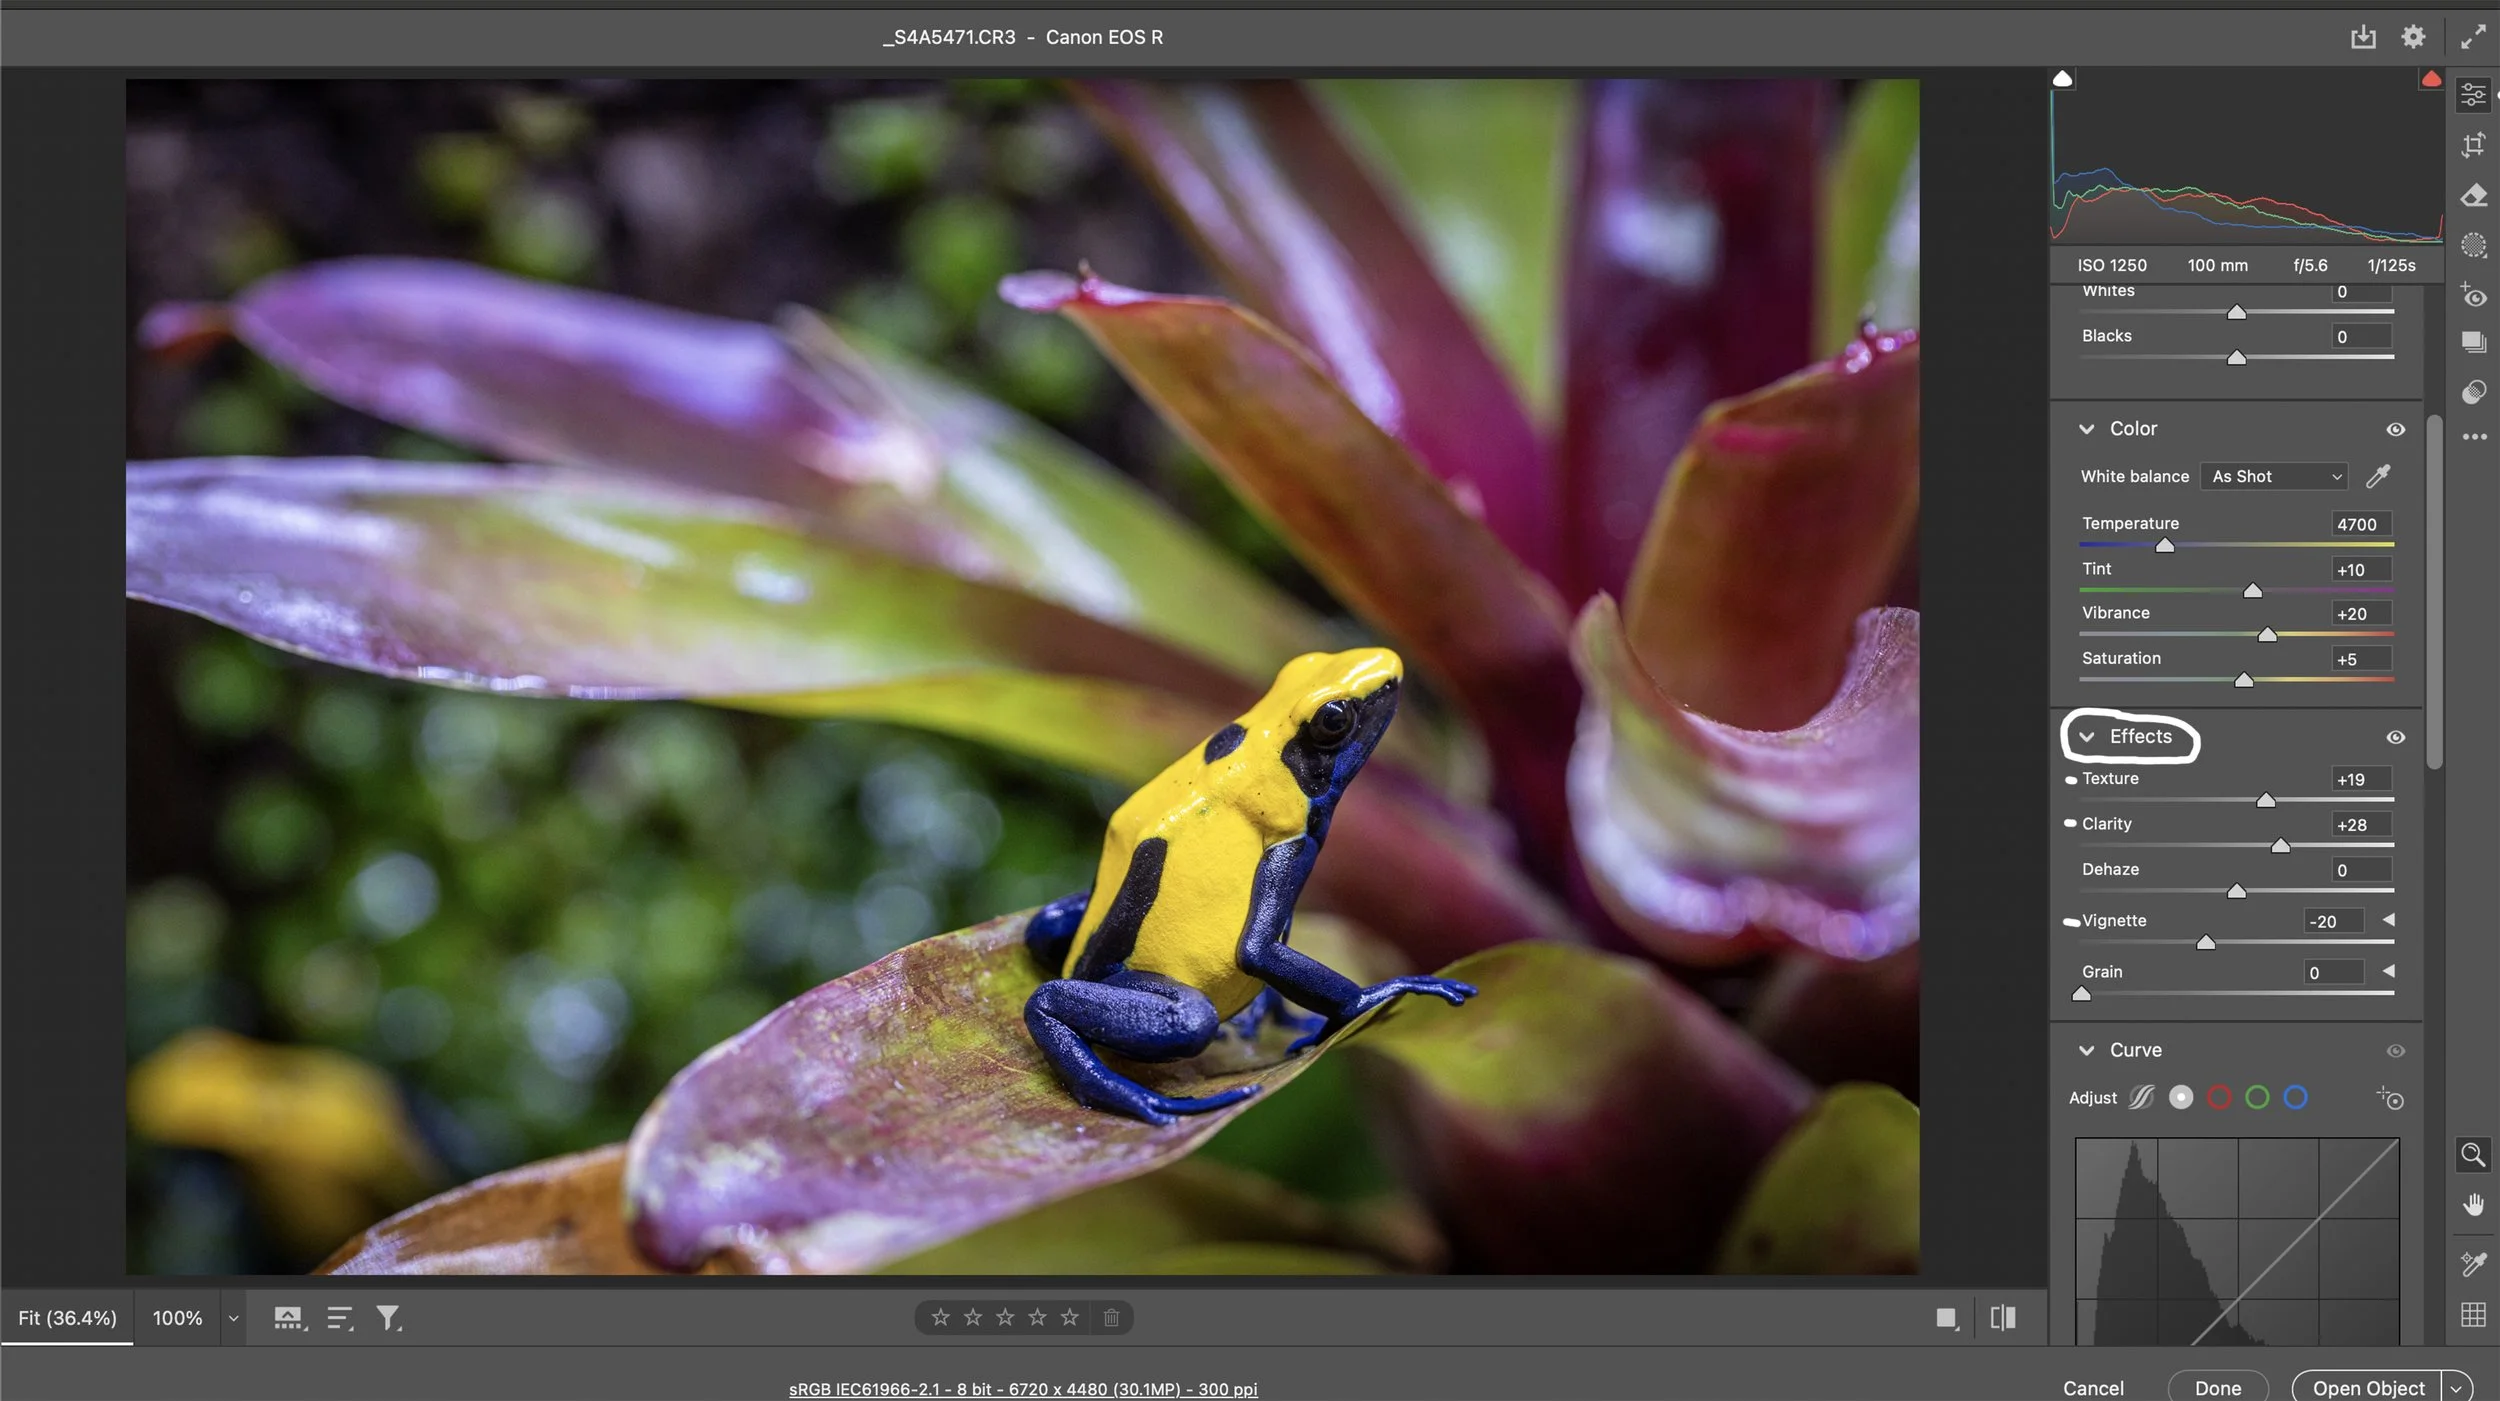
The Effects sliders are next. I always add some texture to the subject. I pushed the Texture slider to +19. I also pushed the Clarity slider to +28. The Clarity slider changes the contrast around the edges of objects in the photo. The only other slider I use in the Effects slider is Vignette. Adding a Vignette draws focus to the subject.
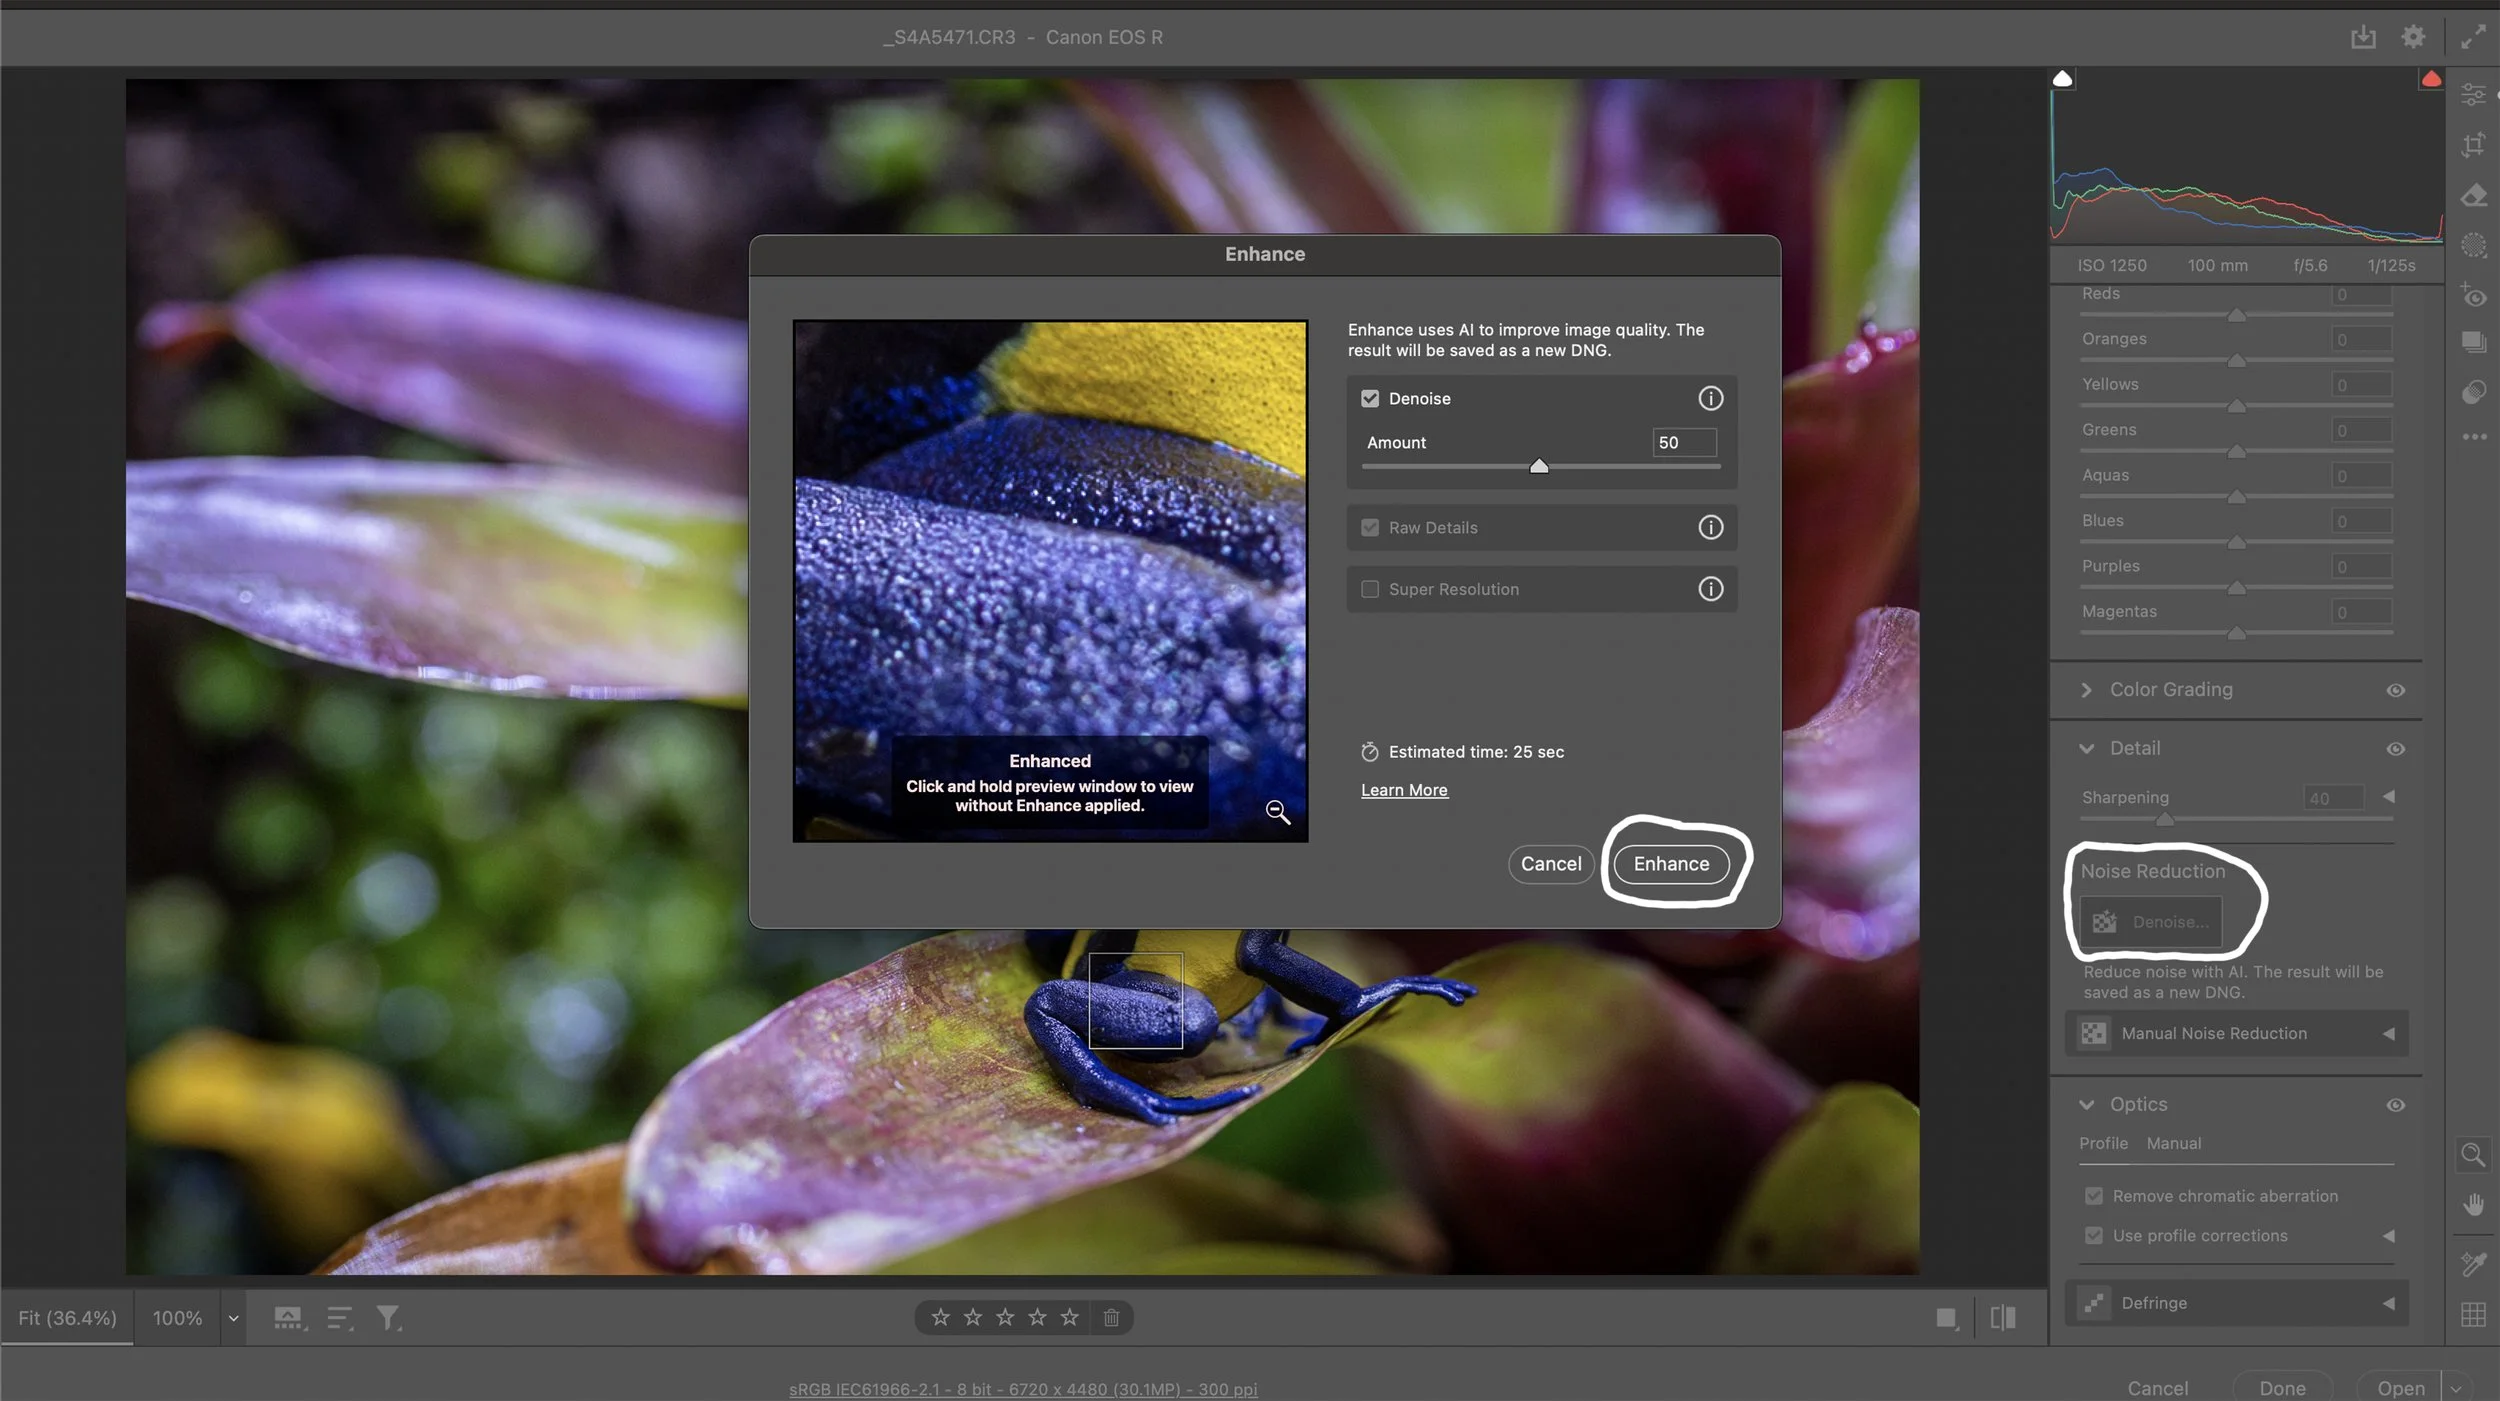
The last step I take in Adobe Camera Raw is Noise Reduction since I use higher ISOs because I’m not using off-camera flash. I used to manually remove noise from photos, but now I simply reduce the noise with AI with one simple click!
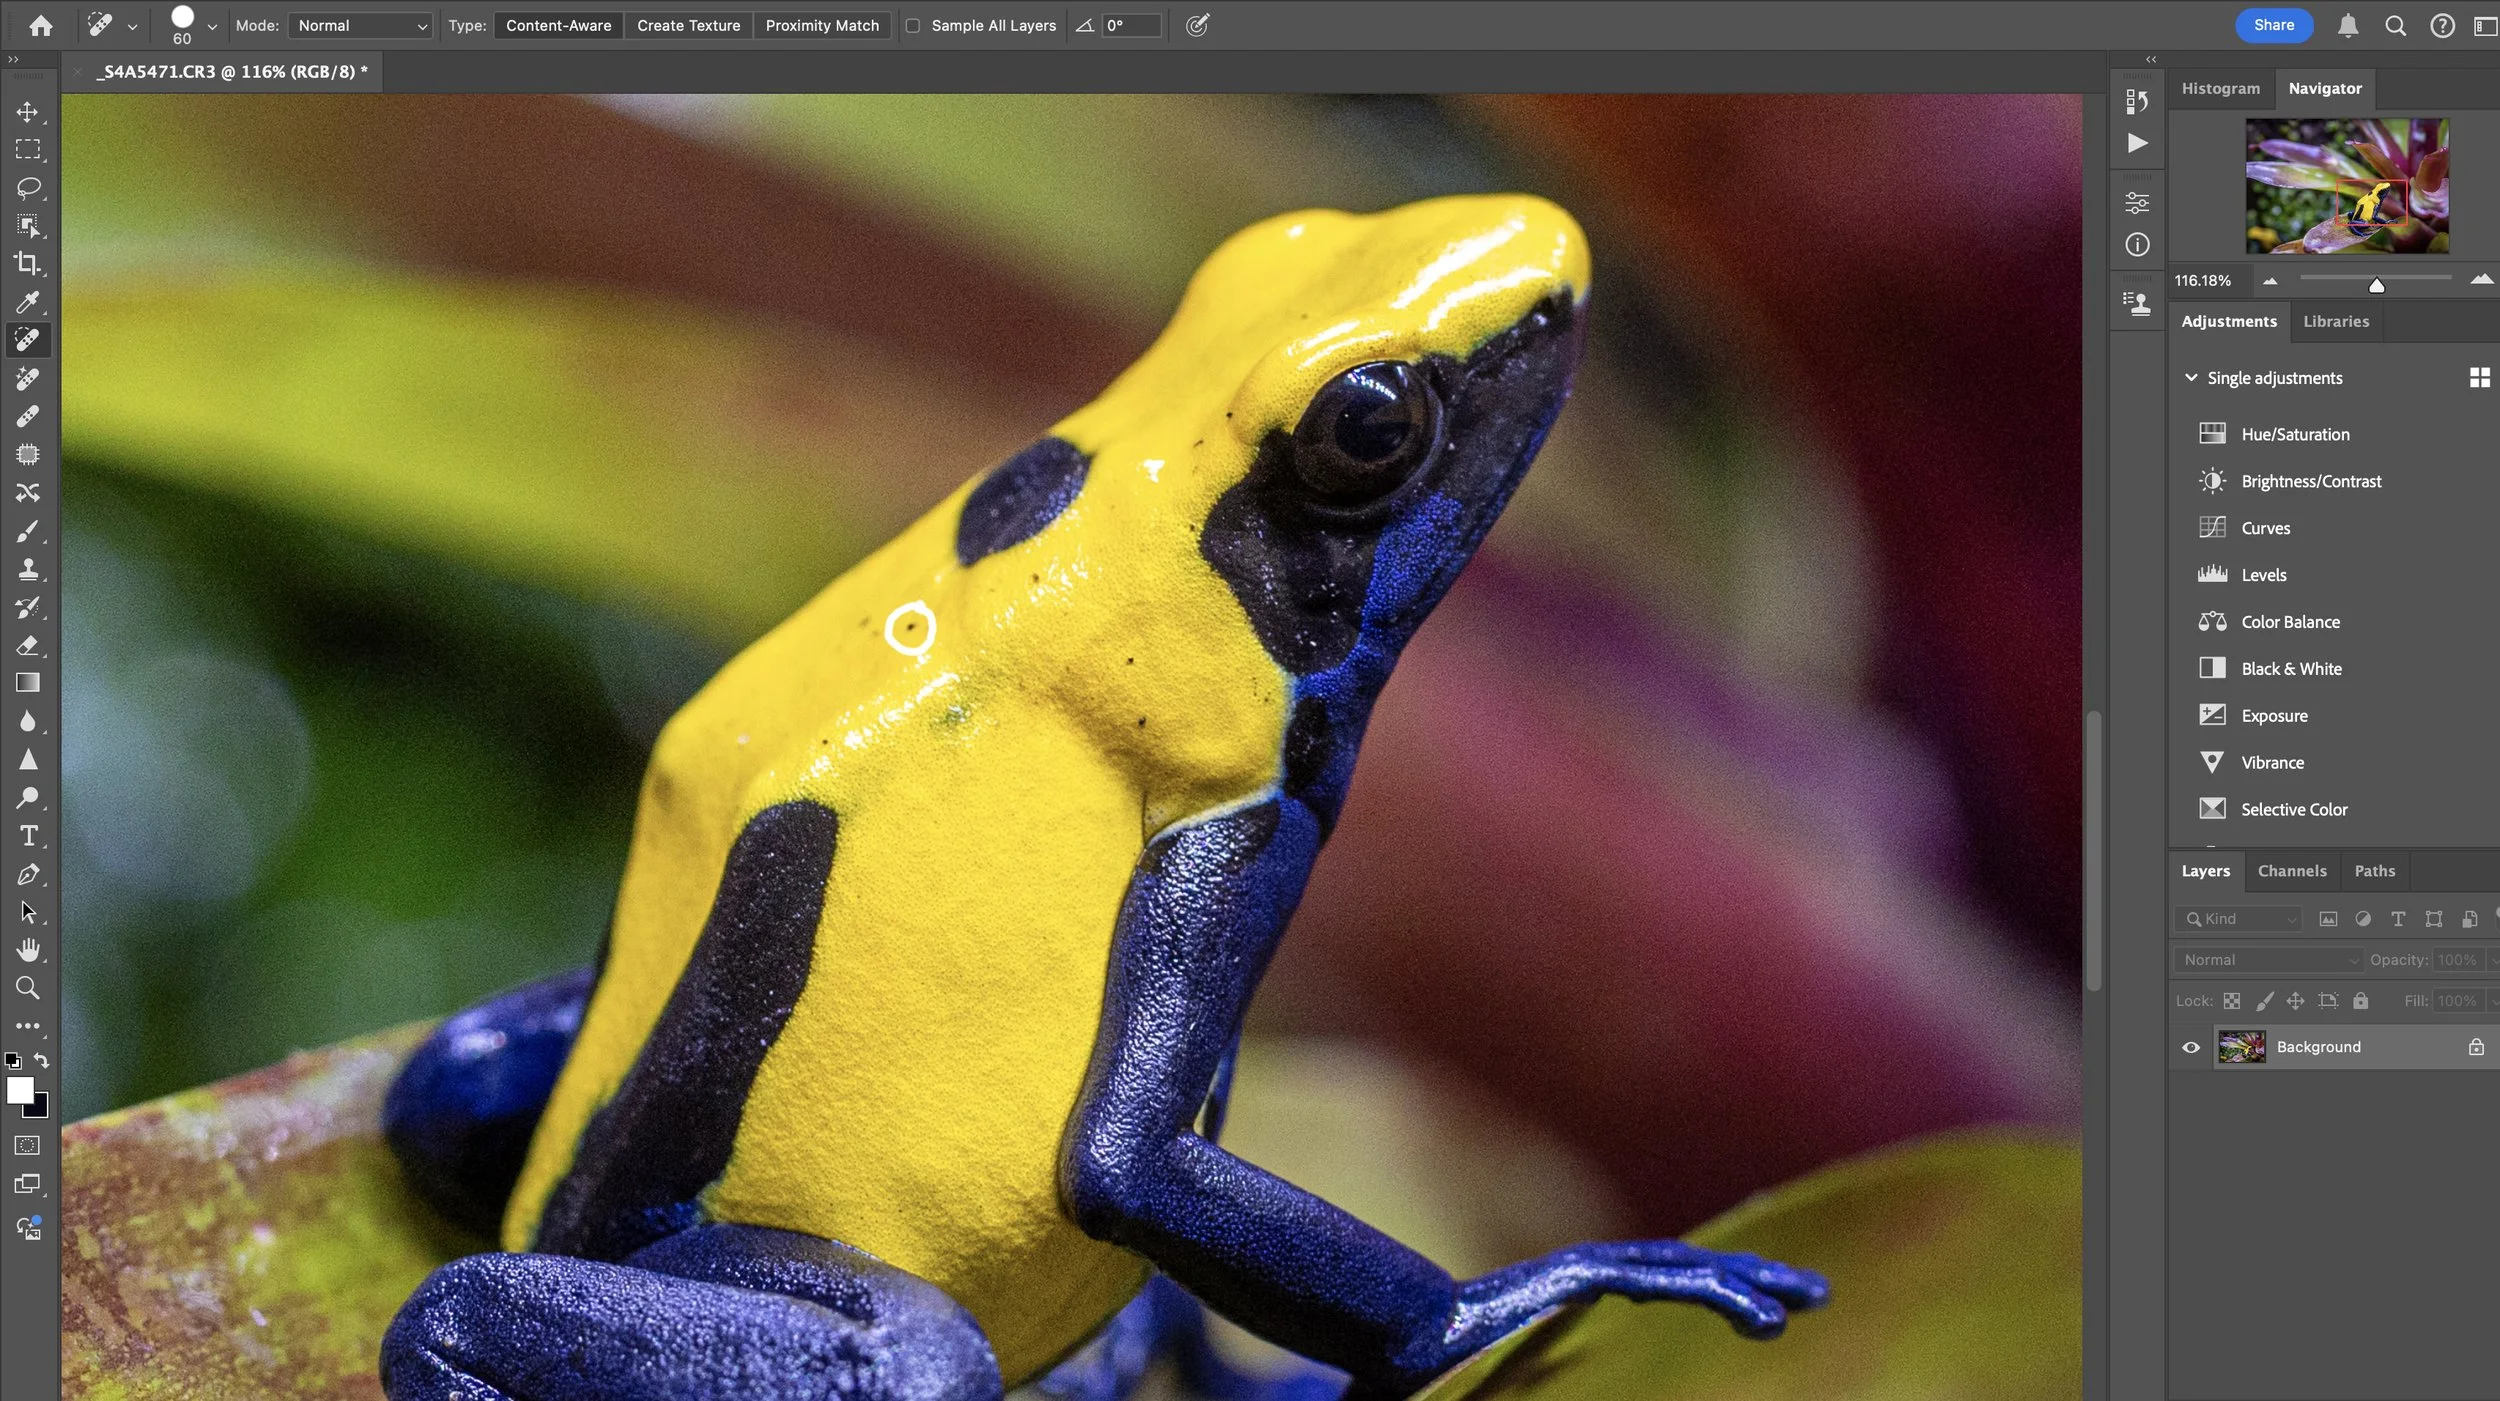
Finally, I open the image in Photoshop for the final touches. I remove blemishes/artifacts with the Spot Healing Brush Tool with Type: Content-Aware, crop the image, then output sharpen for web or print.